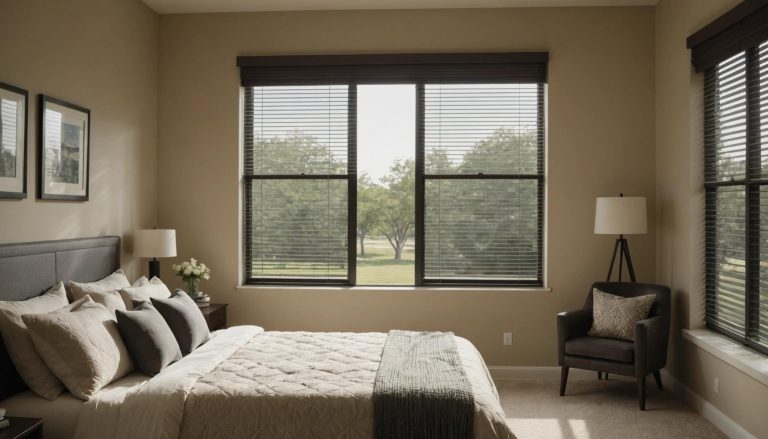
Do Shutters Require Professional Installation? (How-To Guide)
Are you contemplating whether shutters require professional installation? At In Stitches Drapery, we’ve got the expertise to help you decide! With our extensive experience in custom window treatments and installation services, we’re here to guide you through the ins and outs of shutter installation.
In this how-to guide, we’ll explore various types of shutters and their installation requirements, weigh the pros and cons of DIY installation, and offer a step-by-step guide for those adventurous enough to handle it themselves. Plus, we’ll highlight common pitfalls to avoid and equip you with a list of necessary tools and materials. But don’t worry—if DIY isn’t for you, we’ll also discuss when it might be best to call in the pros. Let’s dive in and make your window treatment journey as smooth as a well-installed shutter!
What Are the Different Types of Shutters and Their Installation Requirements?
Shutters are a fantastic way to add style and functionality to your home. They can provide privacy, control light, and even offer insulation. However, the type of shutters you choose can significantly impact the complexity of their installation. Different shutters come with unique requirements, and knowing these can save you time and hassle.
Here’s a rundown of popular shutter types and what you need to consider for each:
- Interior Shutters: These are commonly used for aesthetics and light control inside the home. Typically, they are easier to install and can often be a DIY job. Essential tools include a drill, level, and measuring tape.
- Exterior Shutters: Besides enhancing curb appeal, these can offer additional security. Installation may involve attaching shutters to brick or siding, which requires masonry drill bits and anchors.
- Accordion Shutters: Often used for storm protection, these need precise fitting to securely withstand strong winds. This usually requires professional installation, as they may involve intricate mounting systems.
- Plantation Shutters: Known for their classic look, these require careful measurement and custom fitting within window frames, often necessitating professional installation to ensure a snug fit.
- Roller Shutters: Typically used for security or light control. These require attachment of rolling mechanisms above the window, demanding both precise measurement and a bit more expertise—professional help is often recommended.
- Bermuda Shutters: Ideal for sunny climates; they feature a top-hinged design. Installation might need attention to the correct angling for proper shade, and it can be a manageable DIY task with the right tools and skills.
Consider your home’s specific needs and your skill level when deciding on the type of shutters to install. In some cases, the help of a professional can ensure a safe and secure fit, while other shutter types might be more beginner-friendly for those embarking on a DIY project. For more information on selecting the right shutters for your home, you can explore various options at In Stitches Drapery.
Can You Install Shutters Yourself? Pros and Cons
Thinking about installing shutters on your own? It can be a rewarding DIY project, but it’s important to weigh the pros and cons before you start. Doing it yourself could save money and give you the satisfaction of a job well done. However, it could also lead to complications if not done correctly.
Pros of DIY Shutter Installation:
- COST Savings: By installing shutters yourself, you eliminate labor costs, which can be a significant portion of the overall expense.
- Flexible Schedule: Work on your own timetable without having to wait for professional availability.
- DIY Satisfaction: Completing a home improvement project on your own can be extremely gratifying.
- Customization: You have full control over customization options and can make changes on the fly.
Cons of DIY Shutter Installation:
- Skill Requirement: Installing shutters requires knowledge and skill—mistakes can be costly.
- Time-Consuming: DIY projects often take longer, especially for those unfamiliar with the process.
- Risk of Improper Installation: Faulty installation might lead to damage or decreased functionality, requiring eventual professional correction.
- Lack of Professional Tools: Lack of specialized tools might hinder the quality or ease of the installation process.
Consider your confidence and experience level before diving into DIY shutter installation. If in doubt, you might want to review the step-by-step guide in the next section for extra support.
Step-by-Step Guide to Installing Shutters Without Professional Help
Installing shutters on your own can be a rewarding DIY project. With the right tools and a little patience, you can achieve professional-looking results. Follow these steps to install shutters without the need for a professional:
- Measure Your Windows: Begin by measuring the width and height of your windows accurately to ensure the shutters fit correctly.
- Choose the Right Shutters: Select shutters that suit your window size, style, and material preferences (wood, vinyl, or composite). For more inspiration, explore various shutter options available in Spring, TX.
- Gather Your Tools and Materials: You’ll need a drill, level, screws, screwdriver, measuring tape, pencil, and a ladder if your windows are high up.
- Mark the Drill Holes: Hold the shutter against the window and mark where you’ll need to drill the mounting holes. Ensure they’re evenly spaced.
- Drill Pilot Holes: Using a suitable drill bit, create pilot holes in both the shutter and the window frame. This prevents the wood from splitting.
- Attach the Hinges: Secure the hinges onto the shutters with screws. Ensure the hinges are aligned properly for smooth operation.
- Position the Shutters: Hold the shutters up to the window frame and align them with the pilot holes previously drilled.
- Screw in the Shutters: Carefully screw the shutters into place, ensuring they’re level and securely attached.
- Check Alignment: Use a level to ensure the shutters are perfectly aligned for an aesthetically pleasing and functional finish.
- Test the Shutters: Open and close the shutters to check that they operate smoothly without any obstructions.
- Final Adjustments: Make any necessary adjustments to ensure a snug fit and proper function.
With these steps, you can confidently install shutters on your own, transforming your space without needing professional assistance. Next, we’ll cover common mistakes to watch out for during installation.
Common Mistakes to Avoid When Installing Shutters
Installing shutters can seem like a straightforward task, but there are a few pitfalls that even the most DIY-savvy homeowners might encounter. Being aware of these common mistakes can save you time, stress, and potentially money in the long run.
Let’s dive into some of the most frequent errors so you can avoid them when it’s your turn to install shutters:
- Incorrect Measurements: Not measuring your windows precisely can result in shutters that don’t fit correctly. Always double-check dimensions! For guidance on measuring accurately, consider this window measurement guide.
- Improper Alignment: Aligning shutters properly is crucial for functionality and aesthetics. Misalignment can cause operational issues and reduce curb appeal.
- Using Wrong Hardware: Not all shutters use universal hardware—make sure you’re using the correct screws and brackets for your shutter type and wall material.
- Neglecting Level Checks: Failing to use a level during installation can result in crooked shutters that not only look odd but may not function as intended.
- Rushing the Process: Take your time! Rushing can lead to mistakes. Measure carefully, follow instructions, and ensure everything is securely tightened.
- Ignoring Instructions: Every shutter set is different. Ignoring or skimming through the manufacturer’s instructions could lead to installation errors.
- Skipping a Safety Check: Ensure your tools are in good working order and always prioritize safety. Wear protective gear if necessary.
Avoiding these common pitfalls ensures your shutters not only look fantastic but also offer the protection and privacy they are meant to provide.
Tools and Materials Needed for Installing Shutters
Installing shutters can be a rewarding DIY project, but to get it right, you’ll need the appropriate tools and materials on hand. Being prepared with the right equipment not only makes the installation smoother but also ensures a sturdy and long-lasting result. Here’s what you’ll need:
- Measuring Tape: Accurate measurements are crucial for ensuring a perfect fit.
- Level: This tool helps you keep the shutters perfectly aligned.
- Drill and Drill Bits: Essential for creating pilot holes and securing screws.
- Screwdriver: Used for tightening screws into the shutters and wall.
- Hammer: Useful for securing any necessary plastic anchors.
- Screws: Ensure you have the appropriate length and type for your wall material (e.g., wood, brick).
- Wall Anchors: These provide additional support when attaching shutters to drywall or other non-solid surfaces.
- Ladder: Necessary if you’re installing shutters in elevated areas or on a second story.
- Pencil: For marking measurement points and guide holes.
- Protective Gear: Safety goggles and gloves to protect against dust and sharp edges.
Having these tools and materials ready before you start can make the installation process efficient and hassle-free. Additionally, you might want to explore how custom window treatments can improve energy efficiency in your home. Next, we’ll cover the common mistakes to avoid to ensure your shutters are securely and properly installed.
When Should You Consider Hiring a Professional for Shutter Installation?
Shutter installation can be a DIY project for some, but there are times when hiring a professional is the BEST decision. Consider professional help in the following situations:
Complex Window Designs
If your windows have unique shapes—like arched or circular—or feature complex trim, a professional can ensure a tailored fit that enhances your home’s aesthetics. For those exploring various options, understanding the best materials for custom window treatments can also be beneficial.
Lack of Experience or Tools
Don’t have the right tools or experience? Professionals bring both, guaranteeing the job is done efficiently and safely.
High Windows or Difficult Access
When windows are on upper floors or in hard-to-reach areas, safety becomes a priority. A professional installer has the equipment and expertise to handle these challenges safely.
Time Constraints
Short on time? Hiring a professional can save you precious time and prevent potential errors that come with rushing through a DIY project.
Quality and Warranty Considerations
Some shutter brands offer warranties that are only valid with professional installation. Ensure your investment is protected by checking these details.
While DIY shutter installation can be rewarding, there are CLEAR advantages to hiring a professional. When in doubt, consider which option aligns with your needs, skills, and resources.
Conclusion
In the end, whether shutters require professional installation depends on the complexity of the task and personal experience with home improvement projects. While some DIY enthusiasts might handle straightforward installations, intricate designs and high-level precision often necessitate professional expertise. With the nuanced craftsmanship required to ensure shutters are both functional and aesthetically pleasing, investing in professional installation might be the wisest decision for many homeowners.
At In Stitches Drapery, we offer superior services in Montgomery and surrounding areas, including Magnolia, Tomball, The Woodlands, and more. Our team is dedicated to providing exceptional custom window treatments, including blinds, shades, and elegant shutters tailored to enhance your home’s beauty and functionality. Let us handle your installation with professionalism and care. Contact us today at (281) 798-8315 or via email at institchesworkroom@gmail.com. Experience the transformation that expert installation can bring to your home, with warmth and style tailored to your taste.